Bring on fabulous shimmer and shine! There is no makeup product more magical than the iridescently glamorous world of highlighters. One product that has the power to instantly elevate your look to goddess-like proportions is ‘Highlighter’. It adds a luminous glow to your complexion, accentuating your features and giving you that wet radiant finish. But the art of applying highlighter requires more than just swiping it on randomly. With the right techniques and products, you can achieve a stunning, lit-from-within glow that will turn heads wherever you go. So, grab your brushes and get ready to illuminate your beauty routine with the tips and tricks on how to apply highlighter.

What is Highlighting?
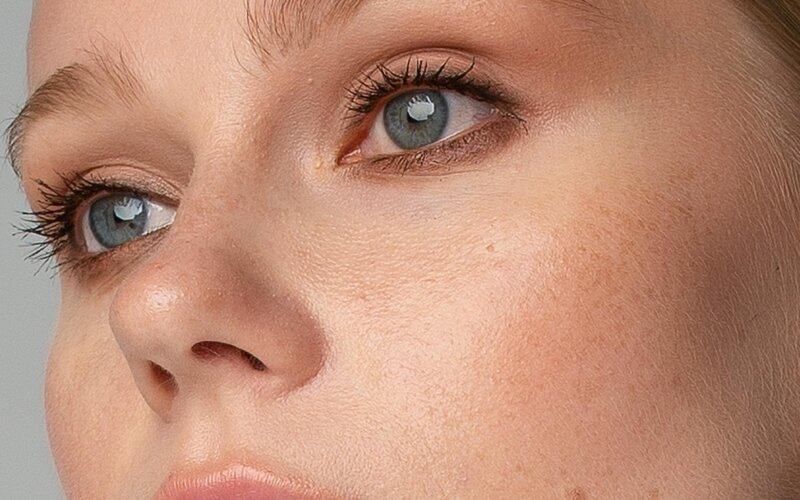
Before we dive into the nitty-gritty of application techniques, let’s first understand what highlighting is all about. Highlighter is a makeup product specifically designed to add light and dimension to the high points of your face, such as the cheekbones, brow bones, cupid’s bow, and the bridge of the nose. It typically comes in powder, cream, or liquid form and contains light-reflecting pigments that create a luminous sheen when applied to the skin. Think of it as your secret weapon for achieving that radiant, dewy glow that Instagram dreams are made of.
7 Places to Apply Highlighter:
Highlighter can be applied to every area you want to accentuate and stand out. It is not just limited to the face but can also be applied to the different parts of your body. Wearing a low-cut top? Add a hint of highlighter to your shoulders and collarbones for an extra touch of allure. Flaunting a sleeveless dress? Glide a bit down the front of your arms to accentuate your arms’ natural curves. And if you’re rocking a skirt or dress, a subtle sweep of highlighter down the center of your legs will leave you looking stunning. So, the next time you’re heading to a wedding, fancy dinner, or any special event, consider giving it a try to elevate your look to new heights. Here are some areas that you can’t miss accentuate on your face:
Cheekbones:
Sweep your highlighter along the tops of your cheekbones, starting from the outer corner of your eye and blending upwards towards your temples. This will instantly lift and define your cheekbones, giving your face a sculpted appearance.
Brow Bone:
Apply a small dab of highlighter underneath your brow bone and blend it outwards towards the tail of your brow. This will brighten and lift your eyes, making them appear more awake and youthful.
Cupid’s Bow:
Add a touch of highlighter to the cupid’s bow (the dip in the center of your upper lip) to create the illusion of fuller, more defined lips. This will make your pout look irresistibly plump and kissable.
Bridge of the Nose:
Lightly dust your highlighter down the bridge of your nose to create a slimming effect and enhance your natural contours. Be sure to blend well to avoid any harsh lines.
Inner Corners of the Eyes:
Brighten up your eye area by applying a tiny amount of highlighter to the inner corners of your eyes. This will instantly make your eyes appear larger and more awake, perfect for achieving that wide-eyed, doe-like look.
On the Forehead:
Artists generally apply highlighter to the center of the forehead but I like to highlight above my eyebrows. Try it out you will love it.
Collarbones:
For an extra touch of glamour, dust your highlighter along your collarbones and shoulders to accentuate your décolletage and give your skin a luminous, sun-kissed sheen.
What Type of Highlighter Should I Choose?
When it comes to choosing the right highlighter, it ultimately comes down to personal preference and skin type. Here are the three main types of highlighters and their respective benefits:
1. Powder Highlighter: Ideal for oily or combination skin types, powder highlighters come in a variety of finishes, from subtle shimmer to intense metallic. They are easy to blend and buildable, making them perfect for achieving a customizable glow. Look for finely milled formulas that glide smoothly onto the skin for a seamless finish. A few of my favorite powder highlighters are Becca Champagne Pop, Maybelline Mater Chrome Highlighter, and Milani Afterglow Highlighter (Not available in India).
2. Liquid Highlighter: Perfect for dry or mature skin types, liquid highlighters offer a dewy, lit-from-within glow that looks incredibly natural. They can be mixed with foundation or moisturizer for an all-over radiance or applied directly to the high points of the face for a targeted highlight. Opt for lightweight, non-greasy formulas that blend effortlessly into the skin for a luminous finish. A few of them are NYX Born To Glow liquid highlighter, and also Swiss Beauty has some amazing highlighters.
3. Cream Highlighter: Cream highlighters are great for all skin types, especially those looking for a long-lasting, high-impact glow. They have a creamy texture that melts into the skin, leaving behind a soft, luminous sheen. Cream highlighters are perfect for creating a natural, “no-makeup” makeup look and can be applied with fingers or a damp sponge for seamless blending. Swiss Beauty Highlighting primer is my favorite right now.
How to Apply Powder Highlighter?

Applying powder highlighter is relatively straightforward, but there are a few key tips to keep in mind for a flawless finish:
1. Before applying highlighter, make sure your skin is clean, moisturized, and free of any excess oil or makeup.
2. Opt for a soft, fluffy brush with tapered bristles for precise application. Avoid using brushes with dense bristles, as they can pick up too much product and result in a heavy-handed application.
3. Before applying a highlighter to your face, gently tap off any excess product from your brush to avoid applying too much at once.
4. Using light, sweeping motions, apply a highlighter to the high points of your face, focusing on the areas mentioned earlier (cheekbones, brow bones, cupid’s bow, etc.). Start with a small amount of product and build up gradually until you achieve your desired level of glow.
5. Blending is key to achieving a seamless, natural-looking finish. Use a clean brush or a damp sponge to blend out any harsh lines and ensure that your highlighter melts seamlessly into your skin.
How to Apply a Liquid/Cream Highlighter?


Liquid and cream highlighters require a slightly different application technique compared to powder highlighters, but the results are equally stunning. Here’s how to apply them like a pro:
1. Prep your skin: Just like with powder highlighter, start by prepping your skin with your usual skincare routine, making sure it’s clean and moisturized.
2. Use your fingers or a sponge: For liquid and cream highlighters, your fingers can be your best tools. Simply dab a small amount of product onto your fingertips and gently tap it onto the high points of your face. Alternatively, you can use a damp makeup sponge to blend out the product for a more diffused, airbrushed finish.
3. Build up the intensity: Liquid and cream highlighters are usually more pigmented than their powder counterparts, so start with a small amount of product and gradually build up the intensity to avoid going overboard.
4. Layer over foundation: If you’re wearing foundation, apply your liquid or cream highlighter on top of it for a seamless, natural-looking glow. Alternatively, you can mix a few drops of highlighter into your foundation or moisturizer for an all-over radiance.
5. Set with powder (optional): To lock in your liquid or cream highlighter and prolong its wear time, lightly dust a translucent setting powder over the highlighted areas using a fluffy brush.
Now that you know the basics of highlighter application, let’s go over some do’s and don’ts to ensure you’re getting the most out of your glow:
Do use a highlighter shade that complements your skin tone for a subtle, lit-from-within sheen.
Do use highlighter in spots that catch light, and showcase your natural features: on cheekbones and temples, down the bridge of your nose, under brows, the inner corners of eyes, and above the cupid’s bow.
Do keep your other makeup like foundation, blush, and bronzer softly matte and shimmer-free.
Do blend out a highlighter with your fingers, a fan brush, or a damp makeup sponge after you’ve applied it. To avoid blobs of product and obvious makeup lines, make sure you blend any harsh edges of highlighter so it fades into the rest of your skin.
Don’t dust or blend highlighter all over your face.
Don’t overdo highlighter. Use a light hand and build up the intensity gradually.
Don’t forget to blend your neck to avoid any harsh lines of demarcation. Be sure to blend your highlighter down onto your neck and chest for a seamless transition.
Don’t apply highlighter to textured skin, as it can accentuate imperfections.
Bottom Line:
The art of applying highlighter is all about technique, experimentation, and finding the right products for your skin type and preferences. Whether you prefer a subtle, lit-from-within glow or a blinding, high-impact shine, there’s a highlighter out there for everyone. Beautyspade encourages you not to be afraid to play with different shades, textures, and application techniques until you find your perfect glow. With a little practice and a lot of shimmer, you’ll be radiating beauty and confidence wherever you go.


